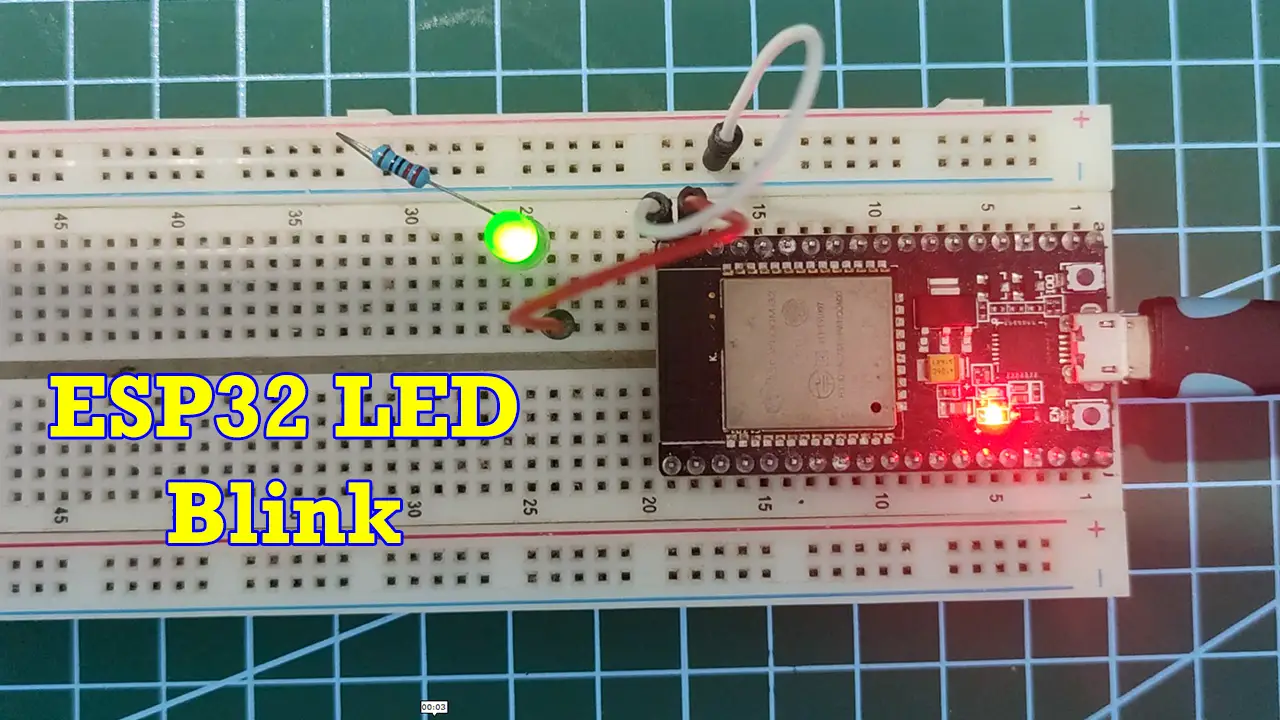
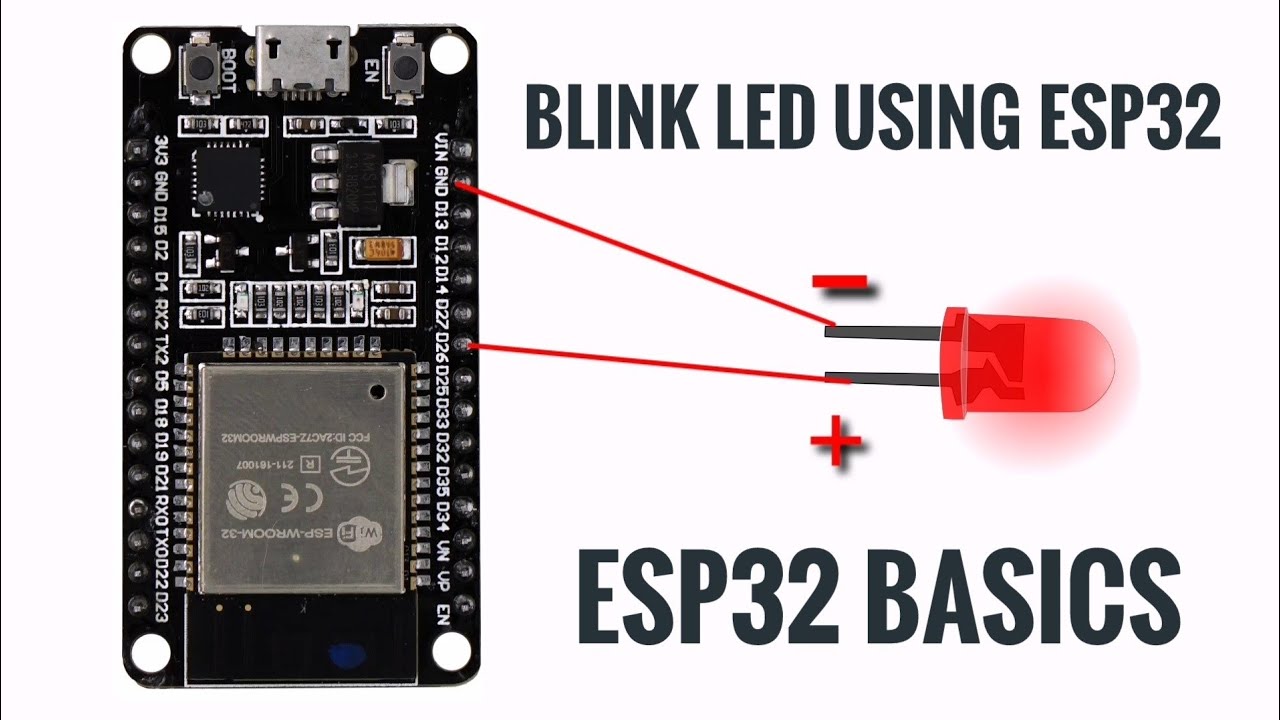
How to blink LED using ESP32
This tiny cheap 8$ module is a dual core 32-bit CPU with built in Wi-Fi and dual-mode Bluetooth with sufficient amount of 30 I/O pins for all basic electronics projects. All these features are very easy to use, since it can be programmed directly from the Arduino IDE. Exciting enough. So let's dig deep to get started with the ESP32.
Getting Started With Esp32 Using Arduino Ide Blink Led Www Programming
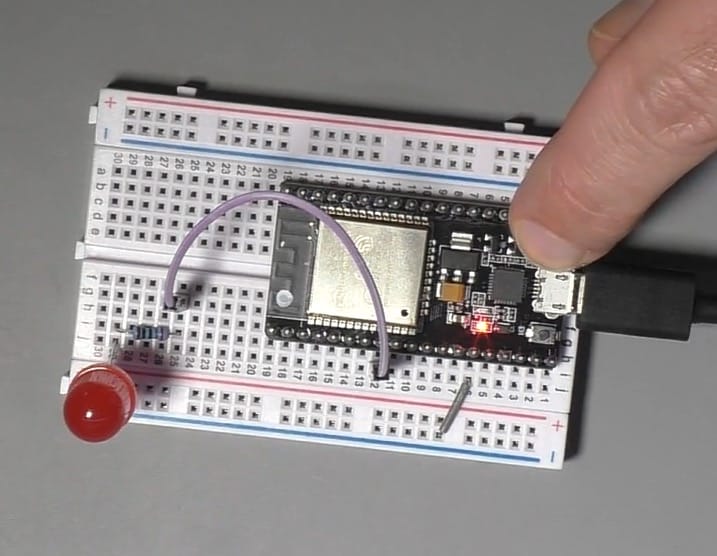
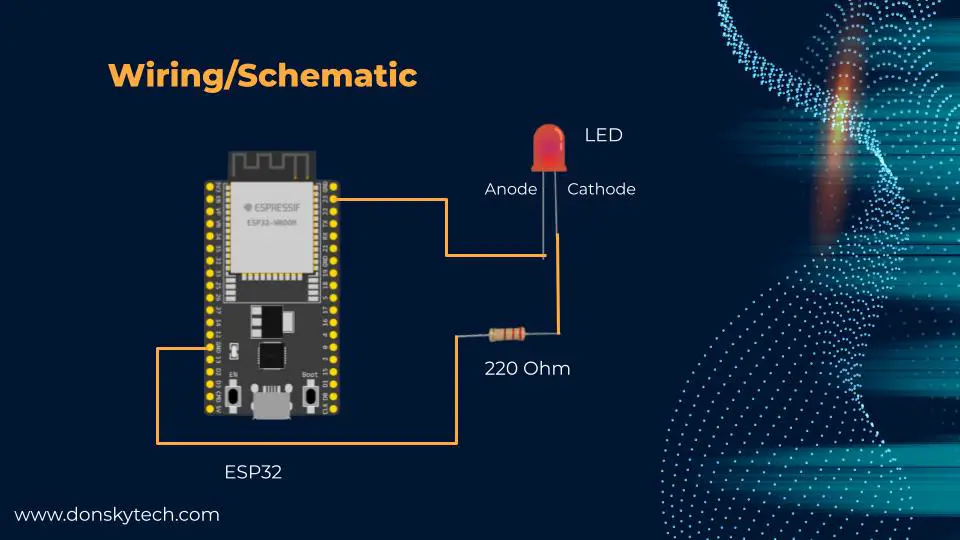
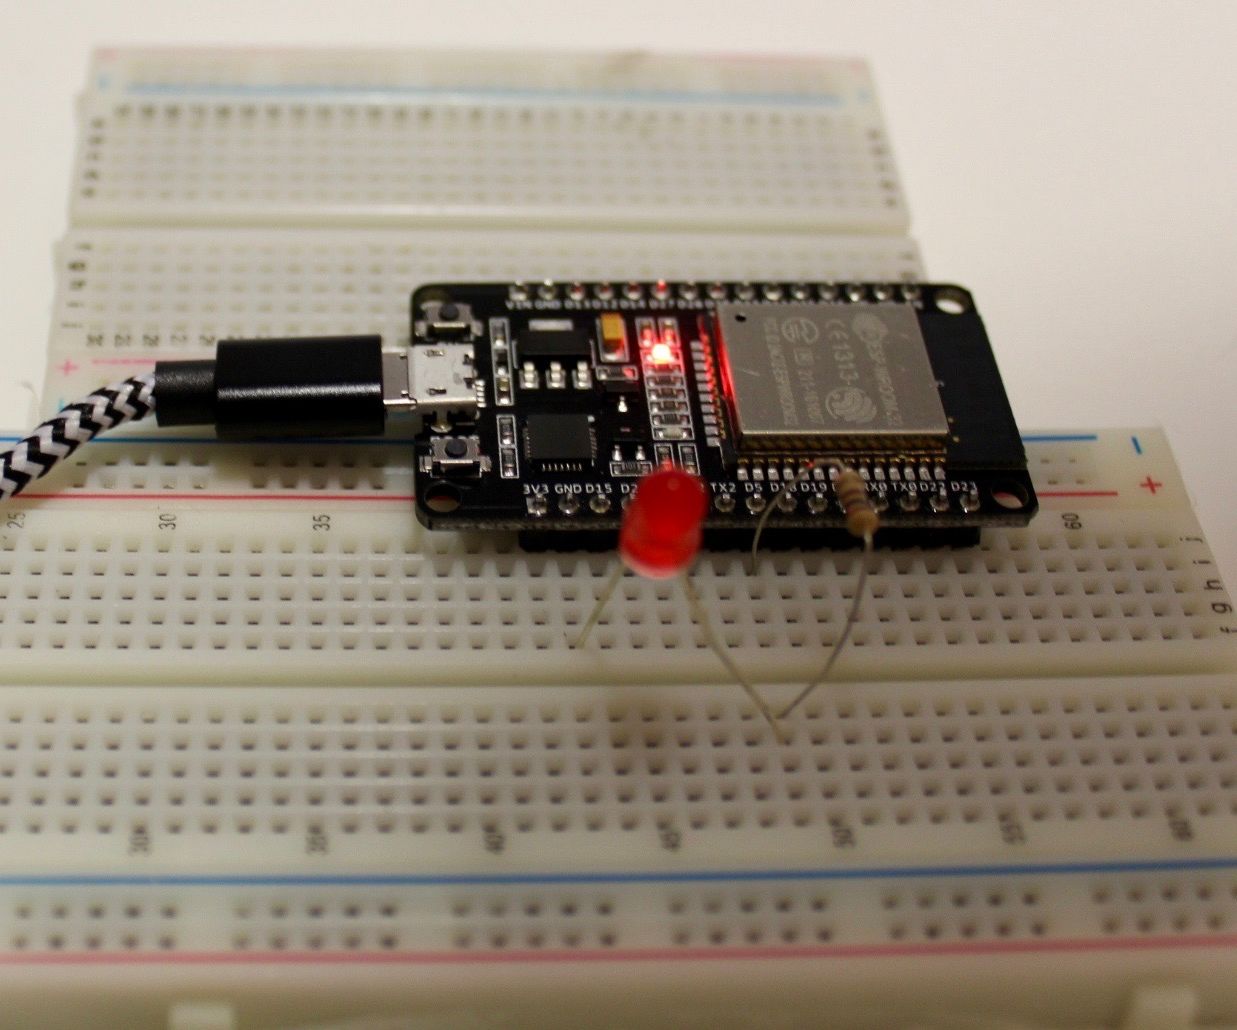
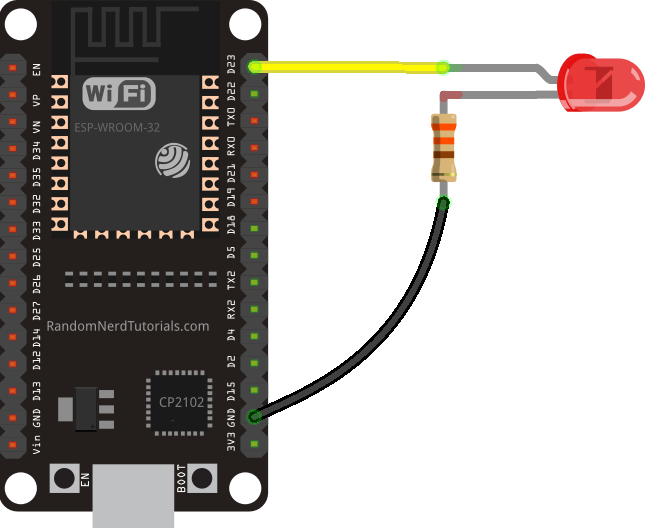
To blink an external LED with our ESP32 we need to follow the following schematic diagram. Take note of the Anode and Cathode pins of the LED and don't forget to add the 220 Ohm current limiting resistor to prevent our LED from being busted. donsky The code for the ESP32 is below. ESP32 blink led

Blink an LED using ESP32 YouTube
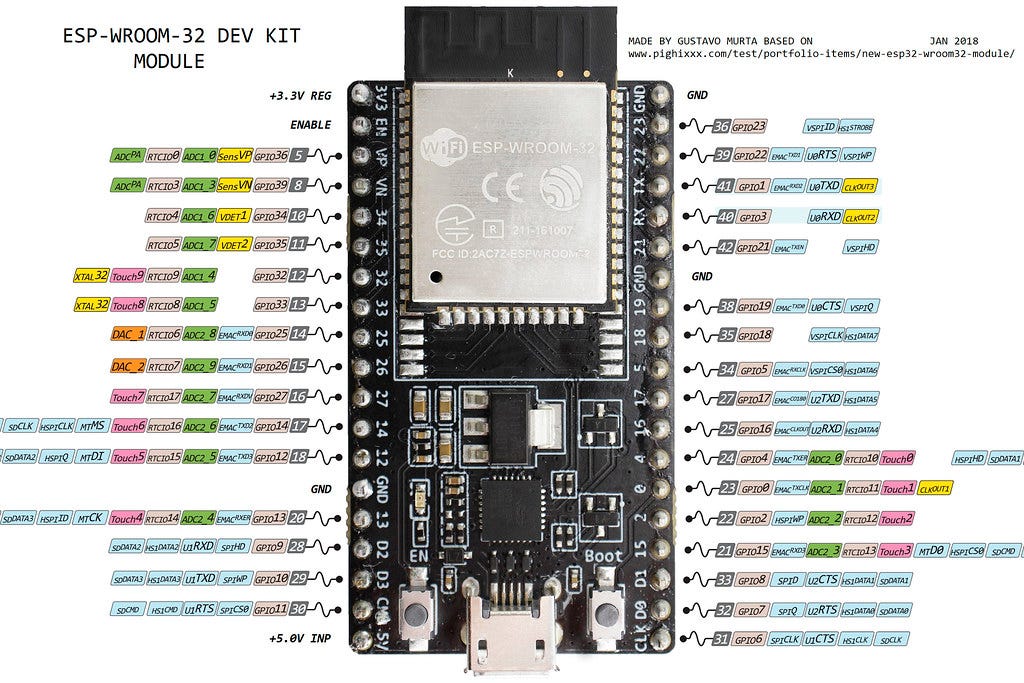
External Capacitors UART It has a couple of buttons and LEDs which are explained below: Micro USB Port: This port is used to connect ESP32 to our computer for programming by using a USB cable. Boot Button: Boot button is used to upload the program from Arduino IDE into ESP32 after clicking on the upload icon on the Arduino IDE.
ESP32 Chapter 2 Blinking LED, Touch Sensor, and Hall Effect by
Blinking an LED with ESP32 . 1. Simple Blinking: The most basic type of blinking involves turning the LED on and off at a regular interval. This can be useful to indicate the status or working of a device. 2. Morse Code Blinking: Using morse code, you can blink the LED to convey a coded message.
Arduinoer ESP32 Simple Web Server to control external LED
Note, we're still using a 220Ω resistor just like the original Blink lesson. But now we're using a 3.3V board rather than 5V (like the Uno or Leonardo), so we'll be supplying less current with the same resistor value. To obtain the predicted current in our circuit, assume a ~2V forward voltage ( V f V f) for a red LED. Thus,

ESP32 blink
Step 1. Plug the ESP32 into your Mac The first thing that you need to do is plug the ESP32 board into your Mac. The board will be powered by the USB cable for this example. So you won't need an external power supply. Plug the USB cable into your laptop Plug the USB cable into your ESP32 board

Kalorie Fahrt Salon esp32 led pin Schüler Korrespondenz organisch
The ESP32-CAM is a development board with an ESP32-S chip, an OV2640 camera, several GPIOs to connect peripherals and a microSD card slot to save images while communication is not available. For now, let's start by knowing the basics. Parts Required ESP32-CAM; FTDI Mini USB for TTL UART Serial Port Converter; Breadboard (optional); LED (optional);
How to blink LED using ESP32
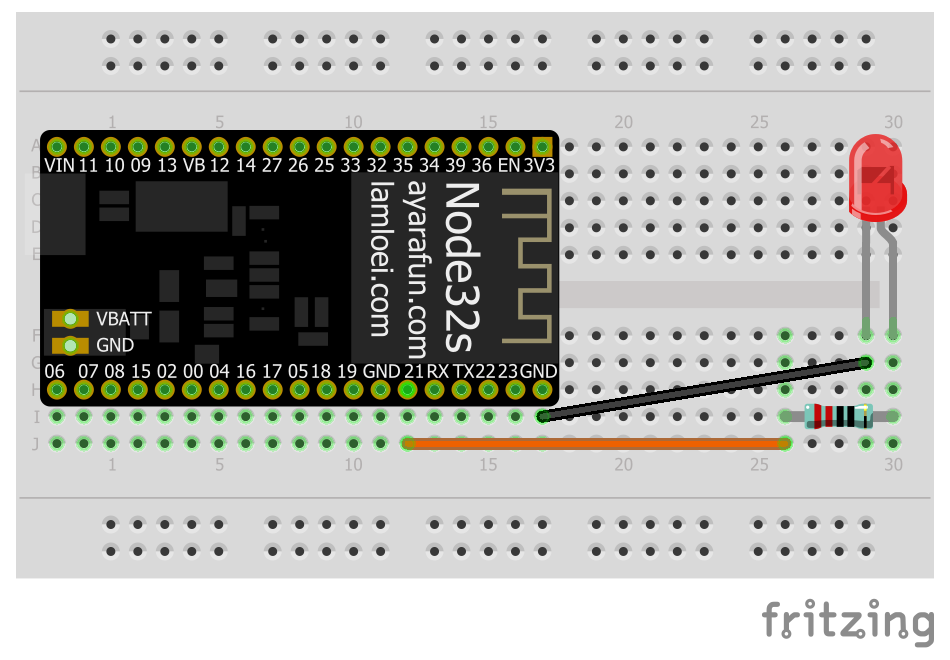
Start the tool and connect your ESP32 board. Open up the Tools and set the Serial port for your ESP32 board Open up the Tools and set the ESP32 board in the board menu. Parts List. 1 x ESP32 board 1 x LED 1 x 470 ohm resistor 1 x breadboard Connecting wire . Schematic
Getting Started With ESP32 on a Mac Blink and LED 7 Steps
Posts: 8571 Joined: Thu Nov 26, 2015 4:08 am Re: Esp32 Led won't stop blinking if external power are used Postby ESP_Sprite » Fri Apr 20, 2018 12:56 am What type of external power supply do you use and how is it connected? The ESP32 needs a power source that can source at least 500mA to function well. paulohz2 Posts: 2
ESP32 and ESP8266 GPIO Programming with MicroPython LED Blinking
Step 2: Set up the ESP32 and blink the internal LED. While most programs use the classic "print 'Hello World' to the console" as a sanity test, internal LEDs are often used instead in ESP32. All ESP32 are equipped with an internal LED.. Step 3: Setting up and blink the external LED. In this last requirement, I used pin D23 as the.

GPIO pins of ESP32 LED Blinking example
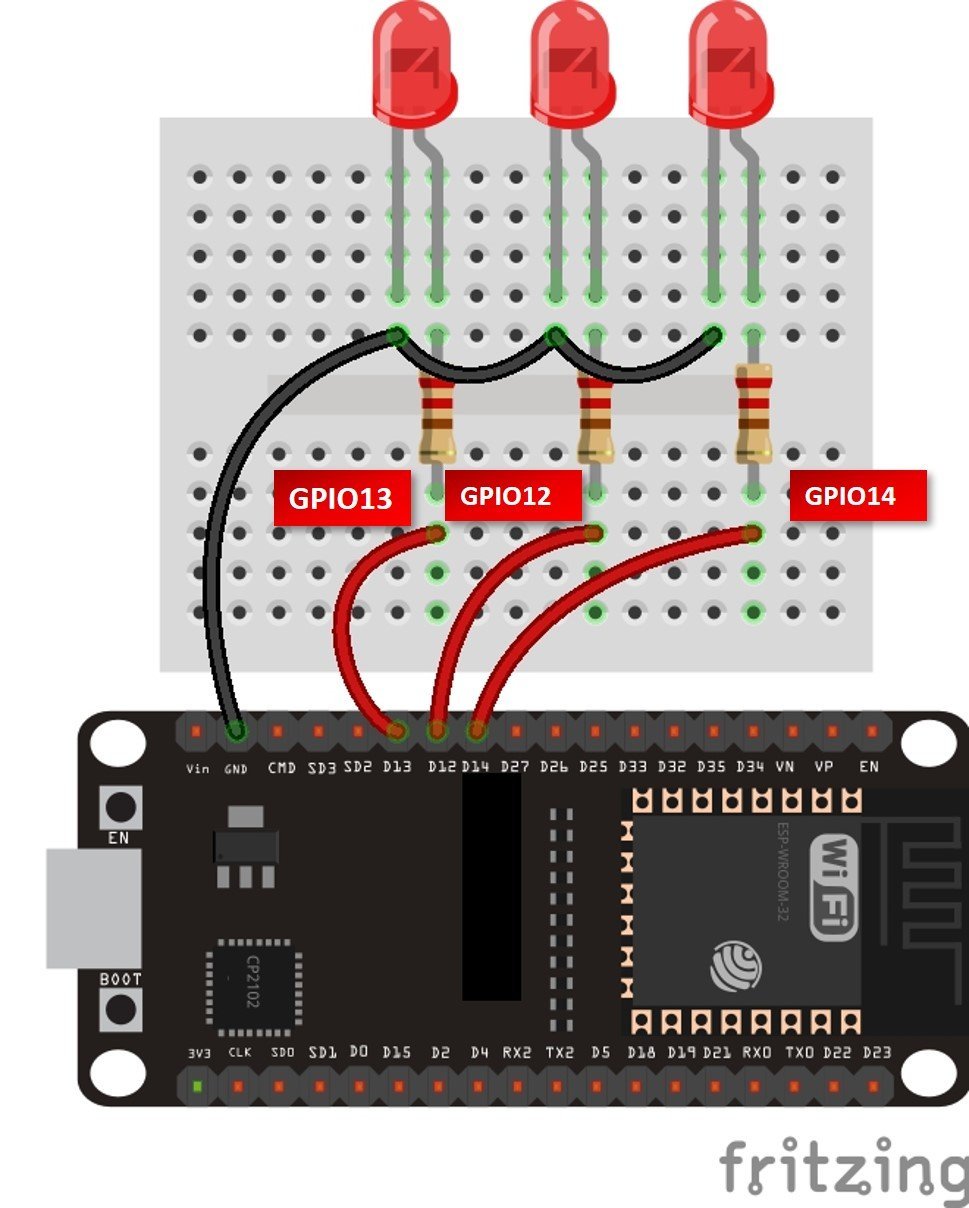
The important thing we need to change is the output to the corresponding pin that we use to connect the external LED. Another thing we could test out is to change the duration of the blinking.
Blinking an LED With ESP32 3 Steps Instructables
LED includes two pins: Cathode (-) pin: connect this pin to GND (0V) Anode (+) pin: is used to control LED's state How LED Works After connecting the cathode (-) to GND: If we connect VCC to the anode (+), LED is ON. If we connect GND to the anode (+), LED is OFF.
Blink led using Esp32ESP32 basic tutorials IoT ESP32 tutorials
Find The Perfect Exterior Lighting For Your Home At Lighting Direct. Shop Today For High Quality Exterior Lighting With 5 Star Service.
Pengalaman Pertama dengan ESP32 Blink Program
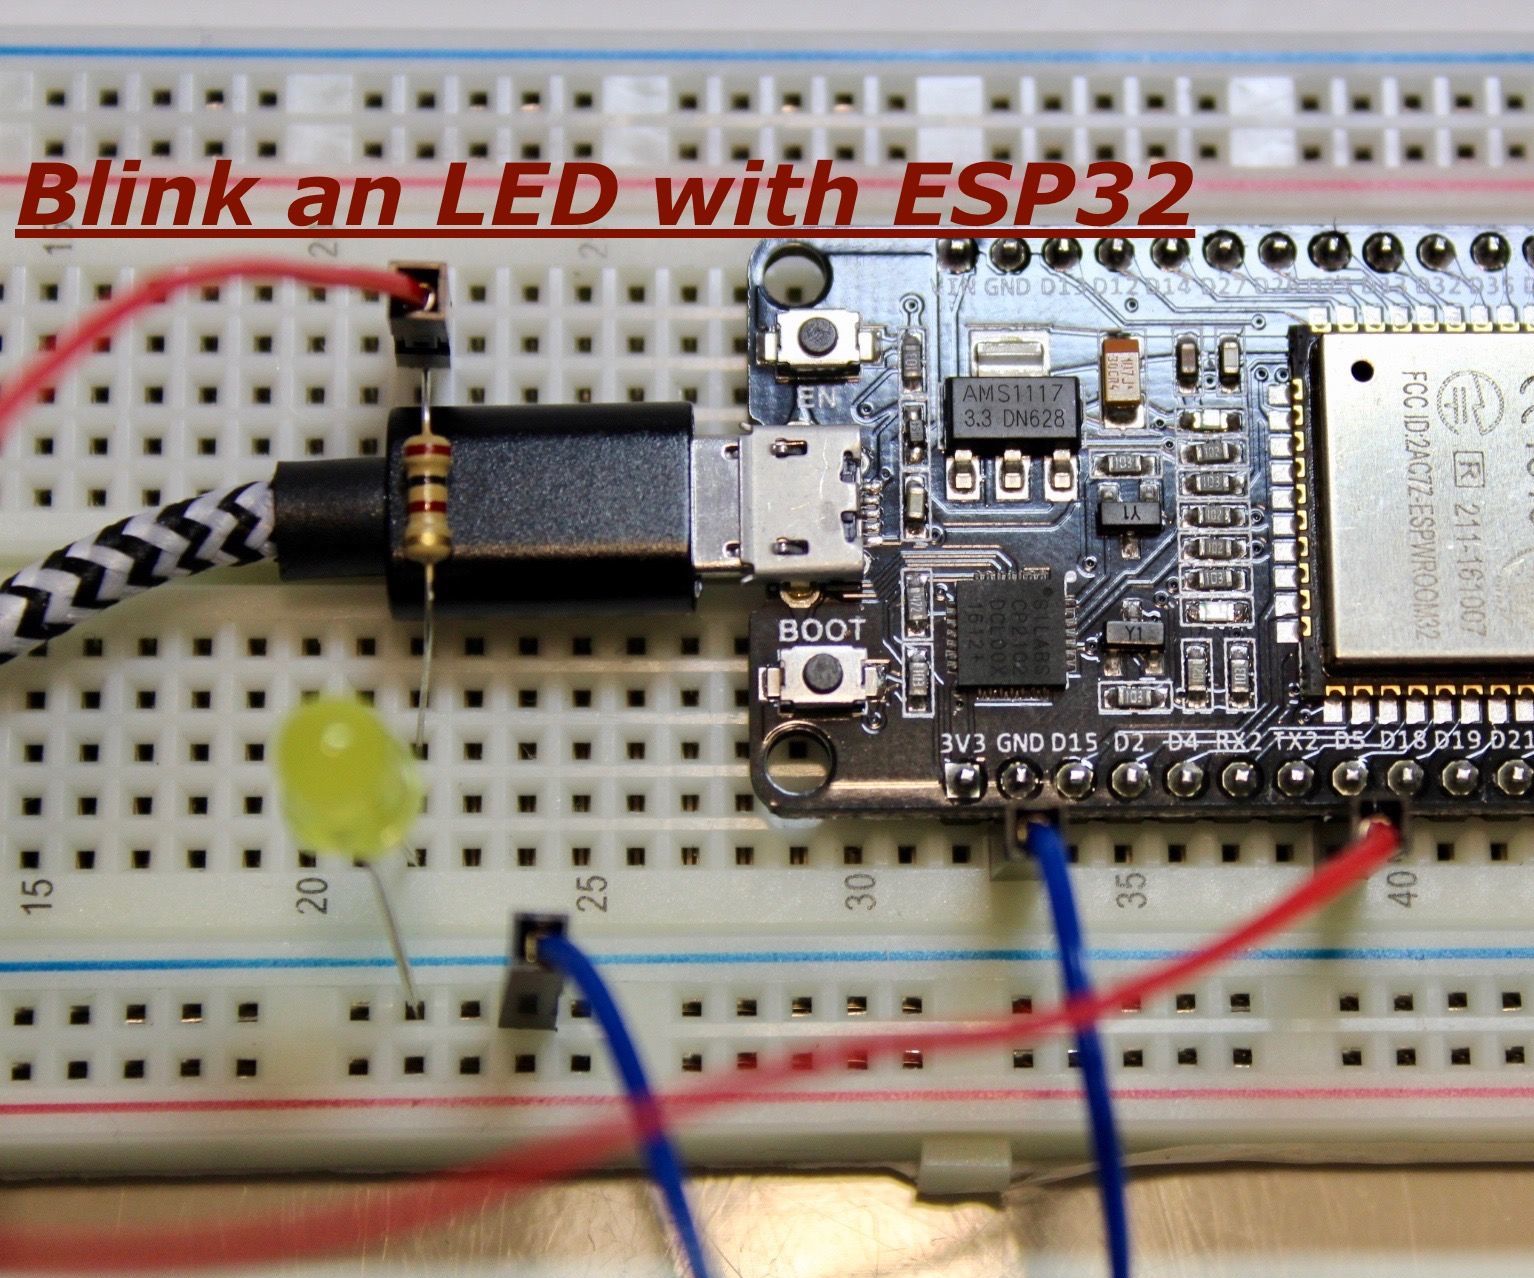
Step 1: Tools and Materials ESP32 Development Board 5mm LED 100Ω Resistor 3 pieces of jumper wires Breadboard Ask Question Step 2: Circuitry Connect the negative pin ( cathode) of the LED, indicated as the flat edge of the LED to ground, shown as the blue wire.

How to blink the damn ESP32 builtin led Sergio Anguita Lorenzo
ESP32 - Control LED via Web In this tutorial, we are going to learn how to control an LED through a web interface using a browser on a PC or smartphone, utilizing the ESP32. In detail, , the ESP32 will be programmed to work as a web server. Let's assume that the IP address of the ESP32 is 192.168..2. Here are the details of how it works:
🚨 ESP32 Blink the Internal Led YouTube
esp32-blink-an-led. Visit Maker Advisor - Tools and Gear for makers, hobbyists and DIYers ». Home Automation using ESP8266 eBook and video course » Build IoT and home automation projects. Build Web Servers with ESP32 and ESP8266 » boards to control outputs and monitor sensors remotely.
